


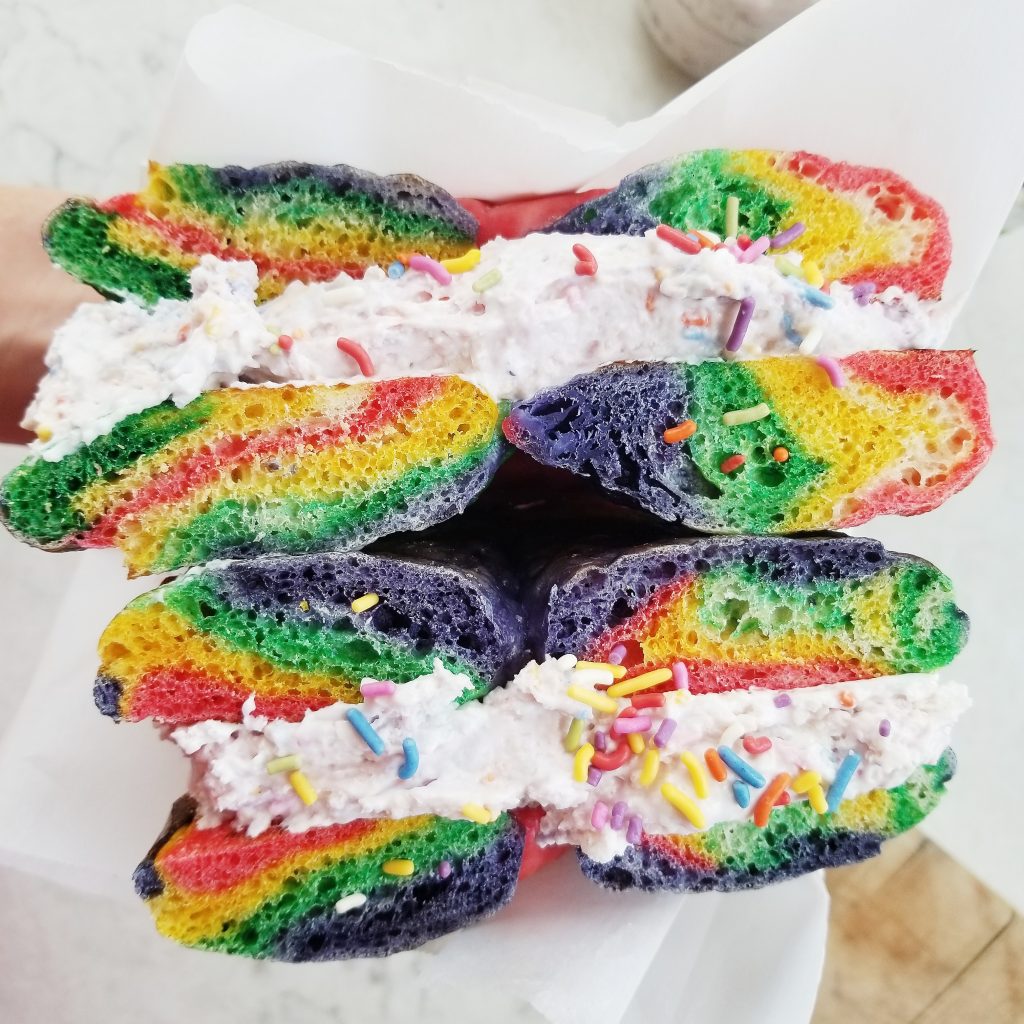
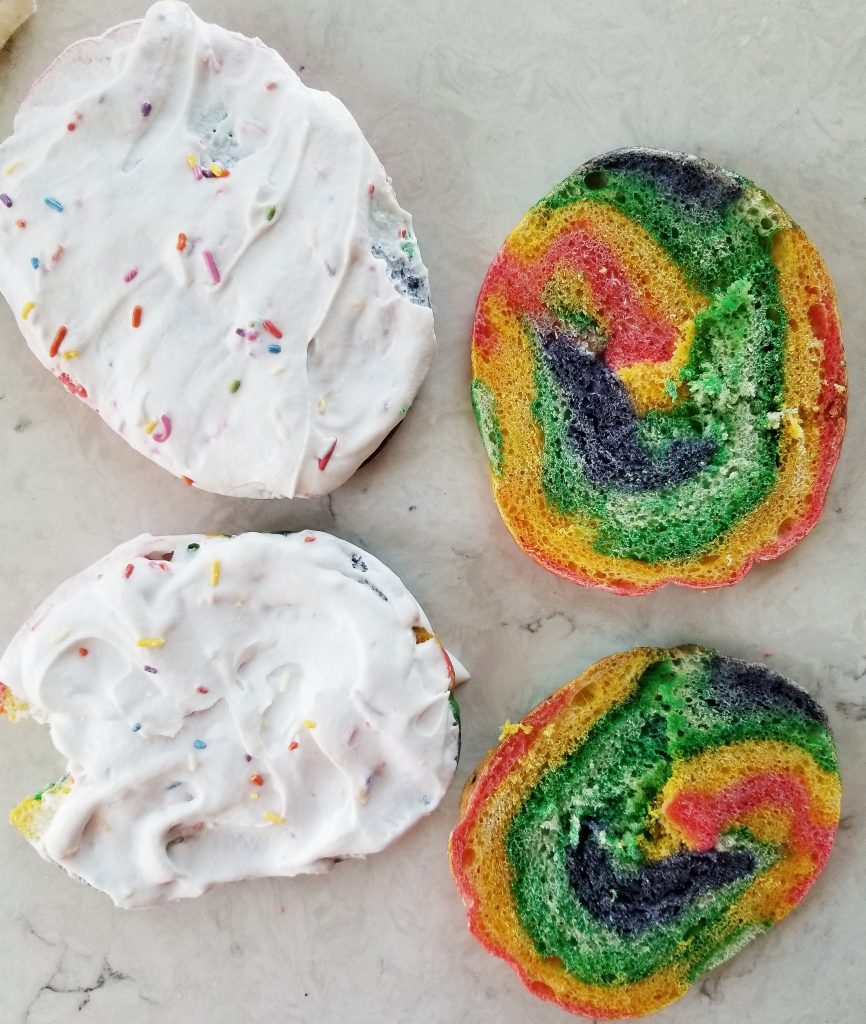
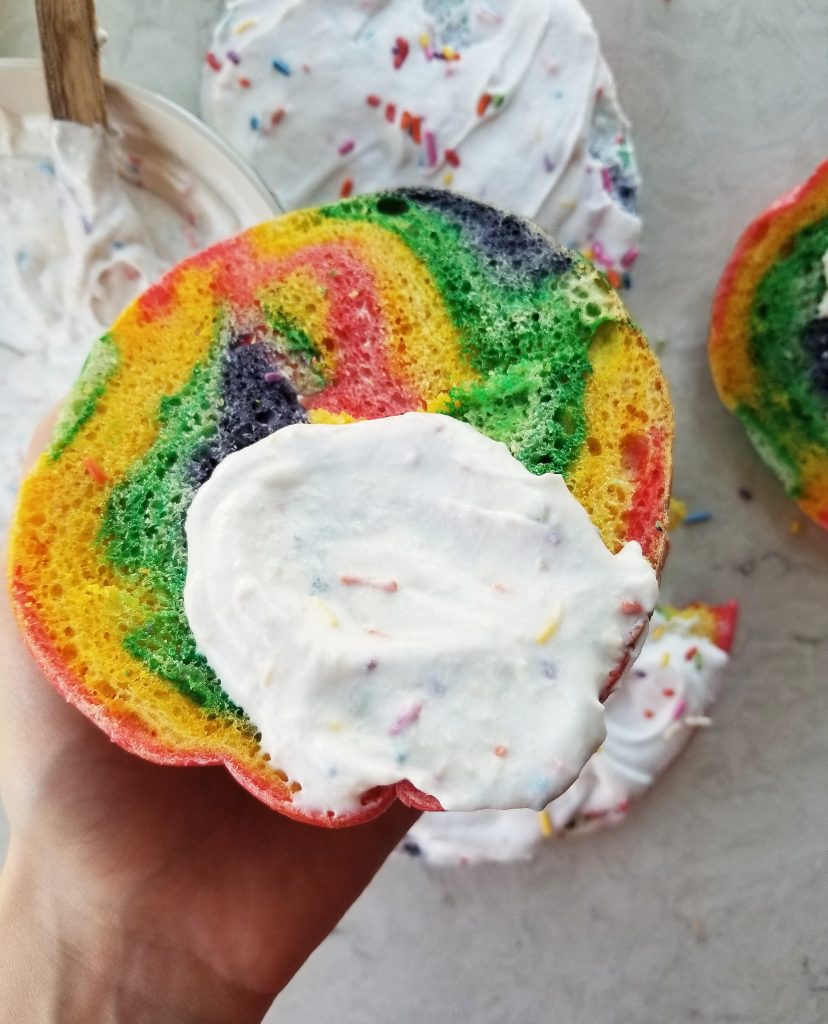
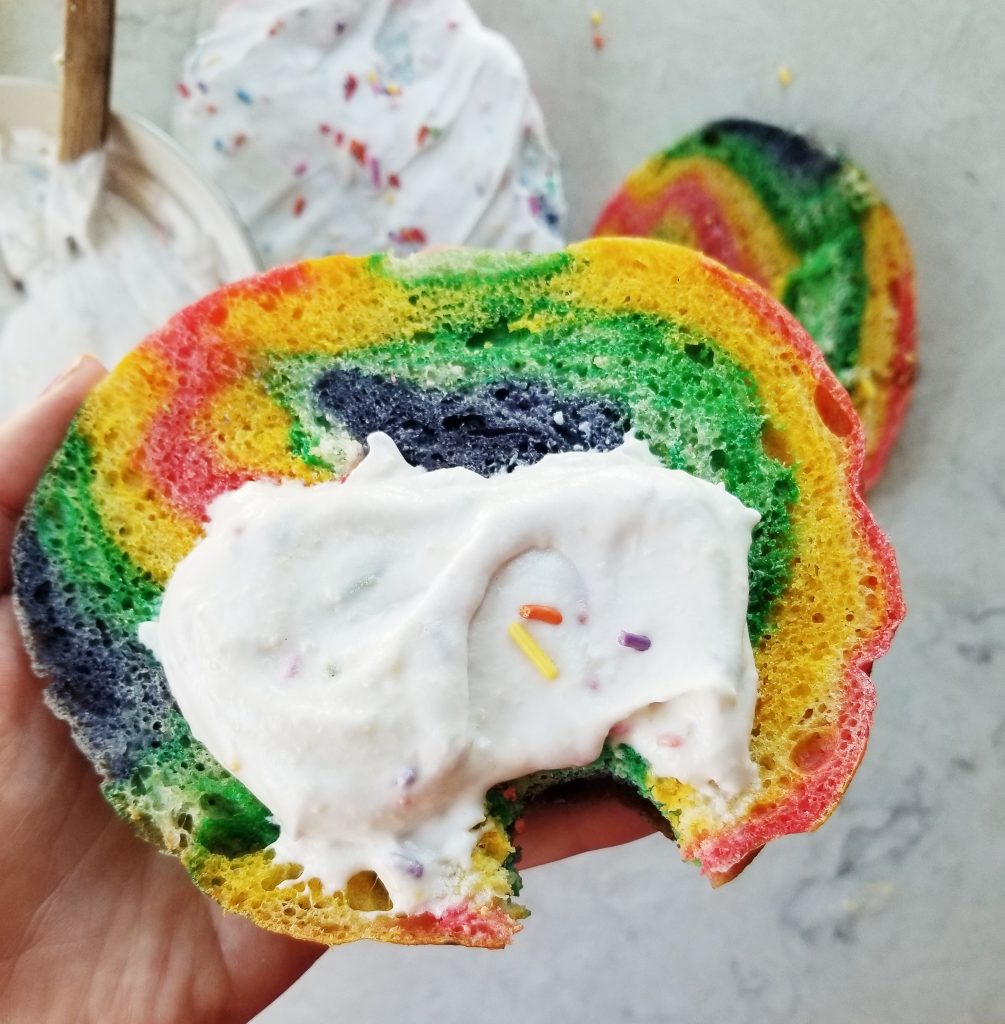
Sourdough Rainbow Bagels. These rainbow bagels are a super fun recipe to make, leavened overnight with sourdough. My rainbow bagels are naturally colored and stuffed with coconut whipped funfetti!
My sourdough rainbow bagel recipe is:
- Delicious
- Fun to make
- Naturally colored
- Vegan friendly
So I said I wouldn't be doing any baking during the hot summer months, but after I successfully made a sourdough starter I just could not resist. I have seen rainbow bagels floating around on pinterest for awhile and really wanted to try making them myself! So I thought... what about sourdough rainbow bagels?!
Think sourdough is complicated? It doesn’t have to be! My Beginner Friendly Sourdough Guide walks you through a simple, no discard method for creating a sourdough starter and baking your first loaf! Plus, it's packed with gut friendly benefits thanks to natural fermentation.
WHAT FLAVOR IS A RAINBOW BAGEL?
The rainbow bagel is a super bright and colorful bagel that looks like something from Dr. Seuss. You might think that it tastes like cake batter or funfetti. But, it has a very subtle, slightly fruity taste, thanks to the fruit derived food colorings.
WHAT ARE RAINBOW BAGELS MADE OUR OF?
Rainbow bagels are actually relatively modest in terms of ingredients. They are basically just your standard bagel with food colorings kneaded in. All you need to make my rainbow sourdough bagels is a sourdough starter, water, brown sugar, bread flour, salt, egg, and colors.
FAQ's
Frequently asked questions about sourdough rainbow bagels.
What is sourdough?
Regular breads are leavened with a packaged yeast. Sourdough, on the other hand is leavened with a wild yeast made at home.
Click here to learn how to make your own sourdough starter
Are sourdough bagels healthy?
When it comes to flour content, sourdough bagels are really no different than regular bagels. The only difference is the type of yeast(bacteria) in them, and the length of time they rise (ferment) for. Some say that sourdough has more beneficial bacteria because it is fermented longer, however, those bacteria would be killed off by high oven temperatures.
Can you use all-purpose flour for sourdough bagels?
You can use all-purpose flour in this recipe. But, since it has less protein, your bagels will have more of a bread-like texture.
TIPS FOR MAKING THE BEST SOURDOUGH RAINBOW BAGELS.
USE BREAD FLOUR NOT ALL-PURPOSE. Bread flour has a higher protein content. This higher protein content will give you that signature "chewy" bagel texture.
FIRST AND SECOND RISE TIME MAY VARY. This rising time can vary depending on how hot your house is. To help keep the bagels warm, wrap in plastic and then wrap the whole tray in a big towel. You can even put them in the stove if your house is drafty.
USE ALL NATURAL LIQUID FOOD DYE. If you want dark vibrant colors like in my pictures, opt for the liquid food dyes. Powdered food dyes will not mix into the dough as well and you will not have vibrant colors.
COVER YOUR TRAYS WITH PLASTIC WRAP WHEN RISING THE BAGELS OVERNIGHT (THIRD RISE). I have used a towel before and the air tends to get through and form a tough "skin" on top of the bagels so this is why I use plastic wrap.
DON'T SKIP BOILING YOUR BAGELS. Boiling bagels is necessary for that signature chewy outer texture!!
COOL ON A WIRE RACK. This will prevent the bottoms from either continuing to cook on your baking sheet, or, getting soggy! Remove bagels from the tray and cool them completely on a wire cooling rack.

HOW TO MAKE SOURDOUGH RAINBOW BAGELS
NOTE: This is a 2 day recipe so check your schedule! I usually start them in the morning on the first day, and then put them in the fridge overnight to finish on day 2.
If you don't have an active bubbly starter yet, and want to try your hand at sourdough, click the link right below this to learn how to make a starter!
How to make a sourdough starter
Sourdough Rainbow Bagels Day 1:
Day 1 of making sourdough bagels involves 2 rising times. The first rise is the dough. The second rise is after you have shaped the bagels. And day 2 is after the 3rd rise, which is an overnight rise in the fridge.
Let's get started on the dough!
First, grab your standing mixer and fit it with a paddle attachment.
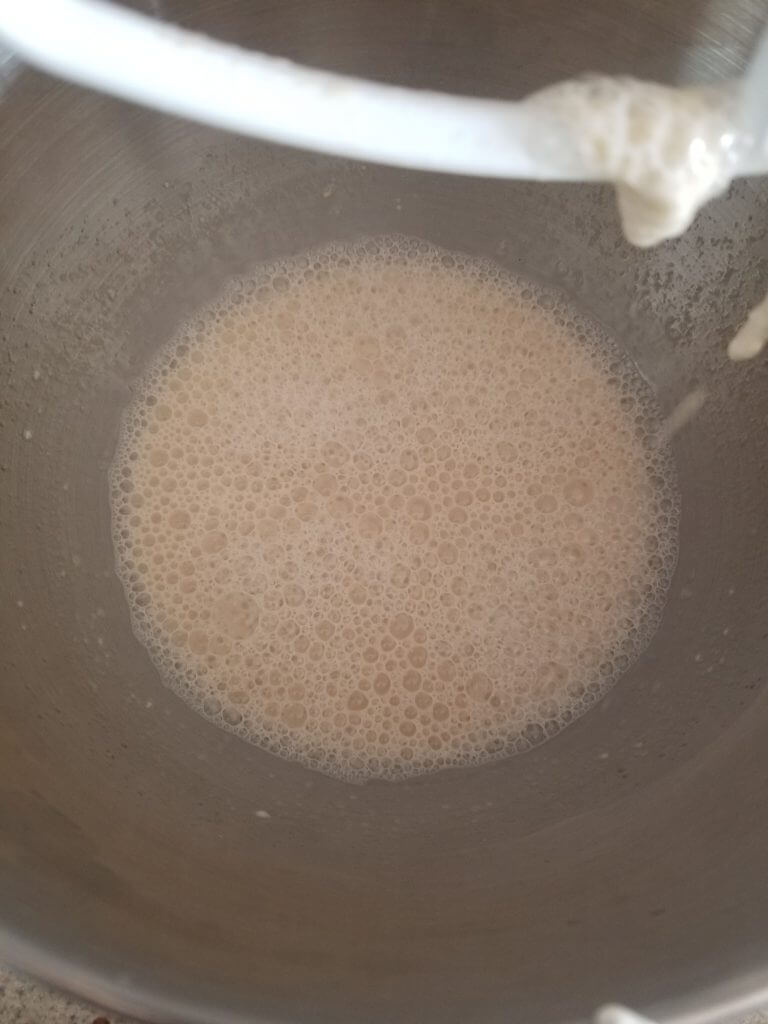
Add 1 cup of active bubbly starter to the mixing bowl along with the 1 ¼ cup of room temperature water and 2 tablespoons of brown sugar. Mix until it is just combined.
Next, switch to a hook attachment.
Add the 5 cups of bread flour and the sea salt.
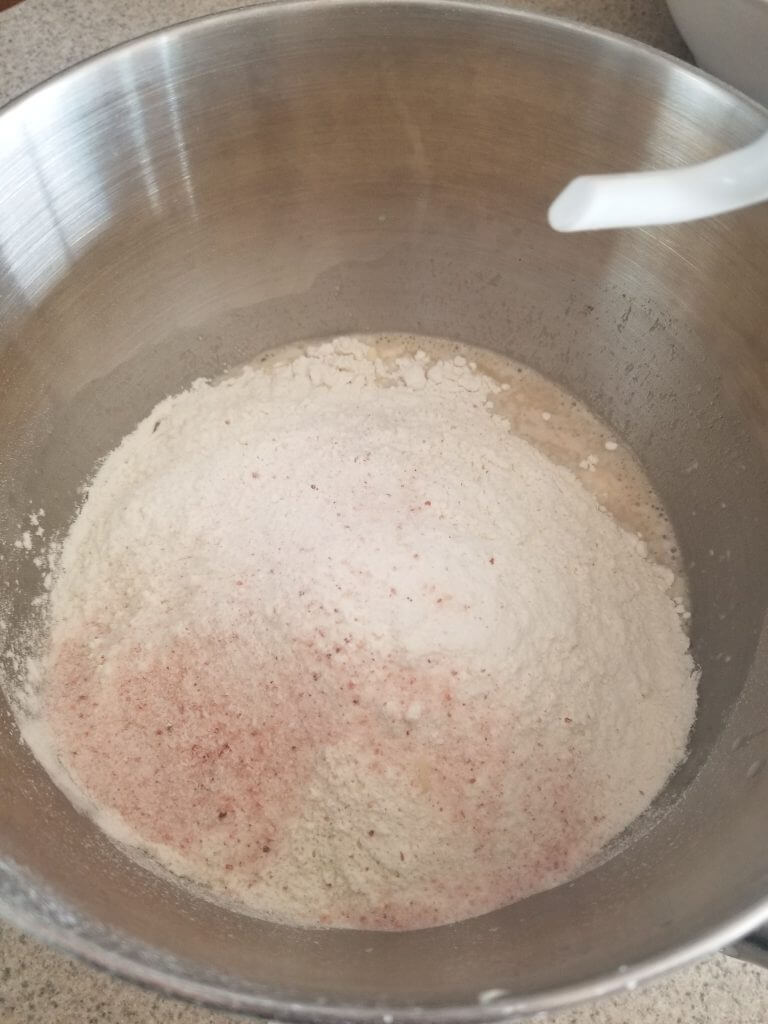
Mix the dough on #2 or #3 speed for about 7 minutes. You can tell when the dough is ready when it has pulled away from the sides, is no longer sticky, and can be pulled without breaking (elasticity).

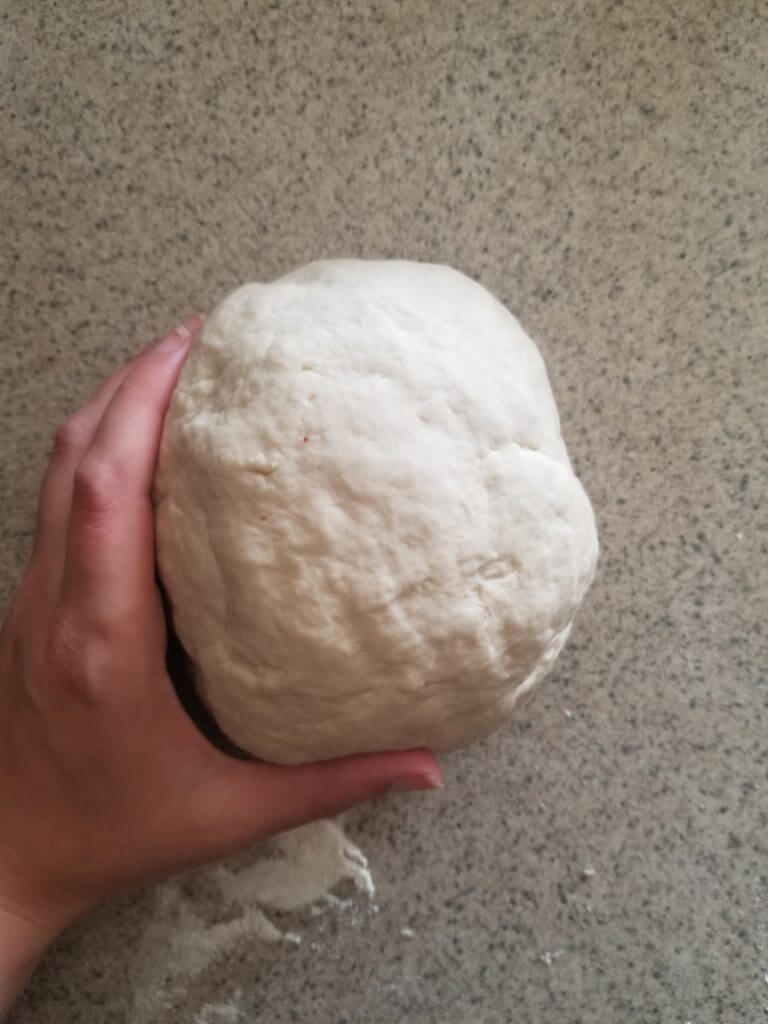
Let your dough rest for ~20 minutes.
Next, shape your dough into a smooth ball.
HOW TO COLOR THE DOUGH FOR RAINBOW BAGELS
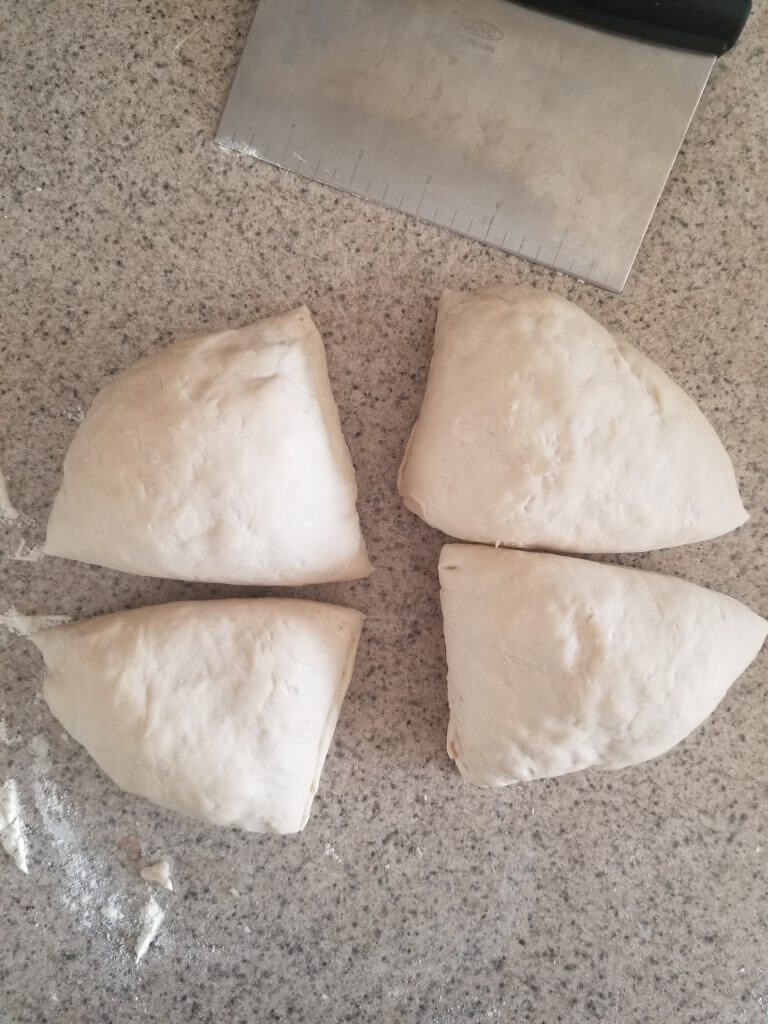
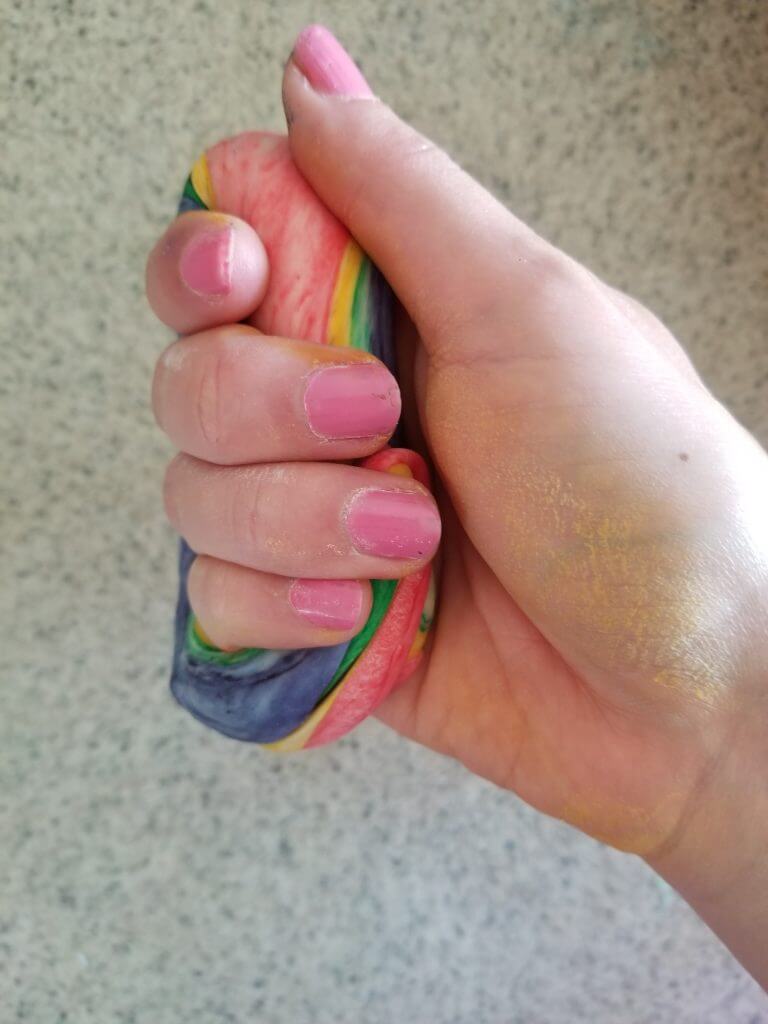
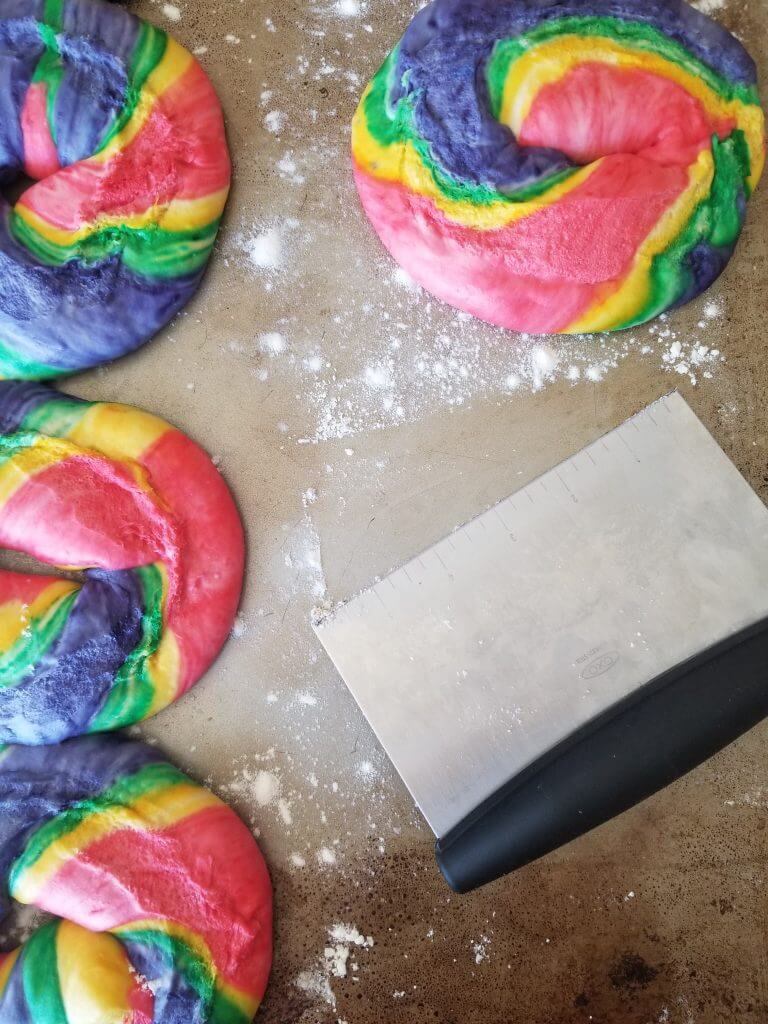
Cut your dough into 4 equal pieces. I use a pastry scraper to cut my dough. If you don't have one, a metal spatula or a big sharp knife will work!
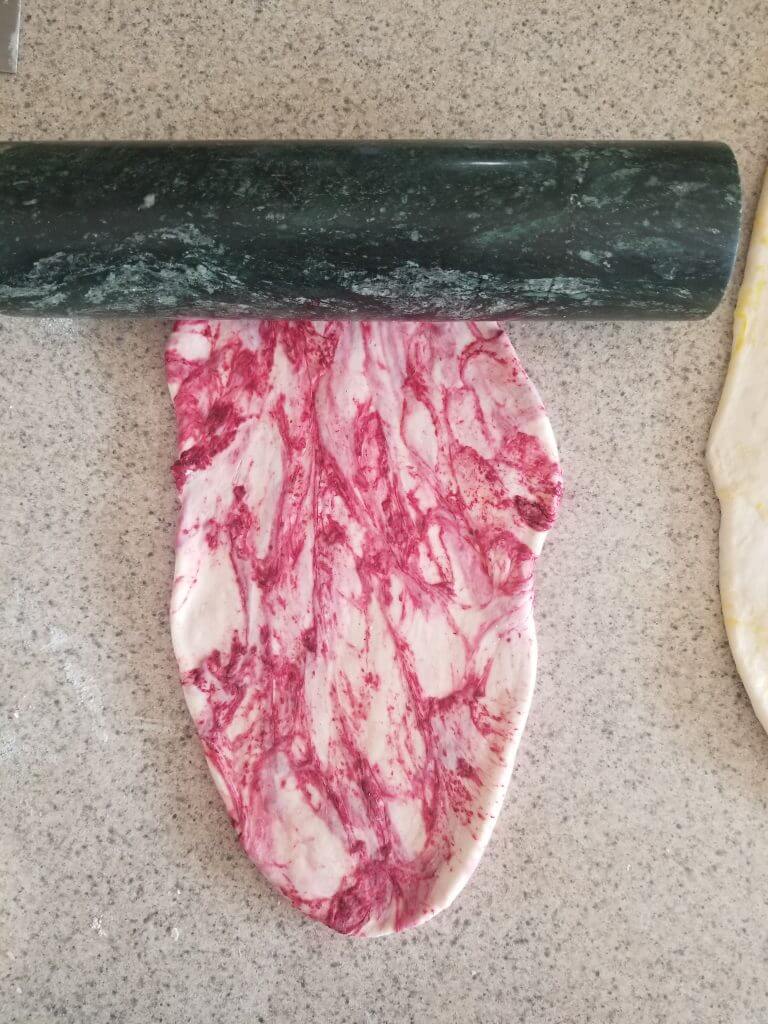
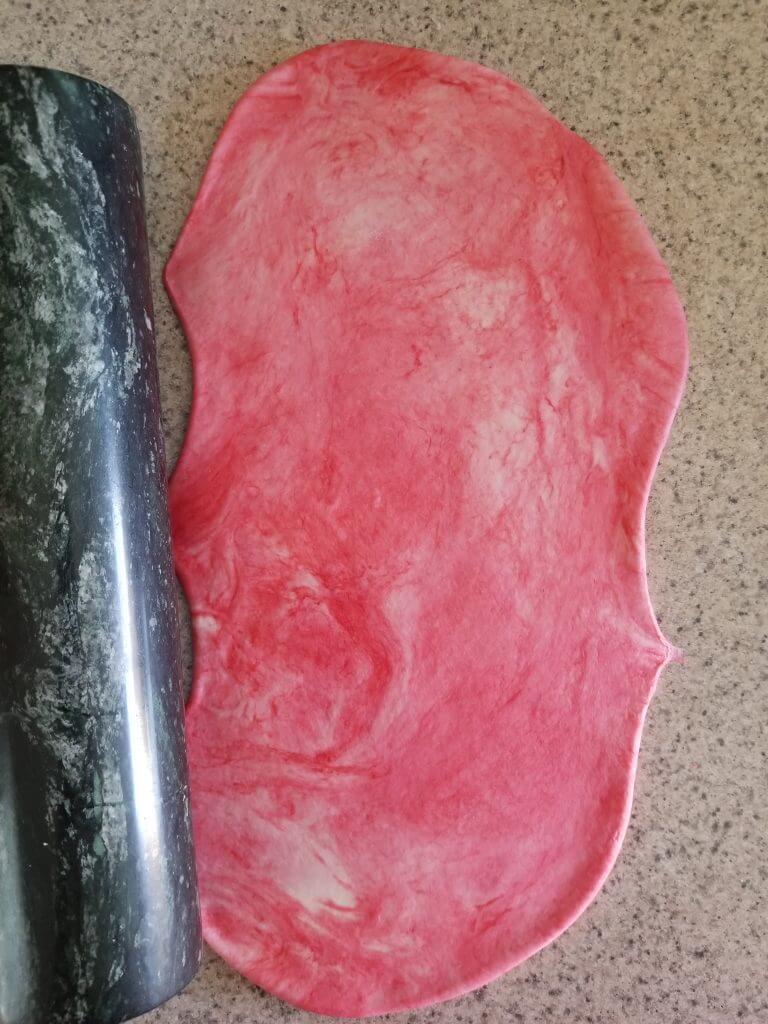
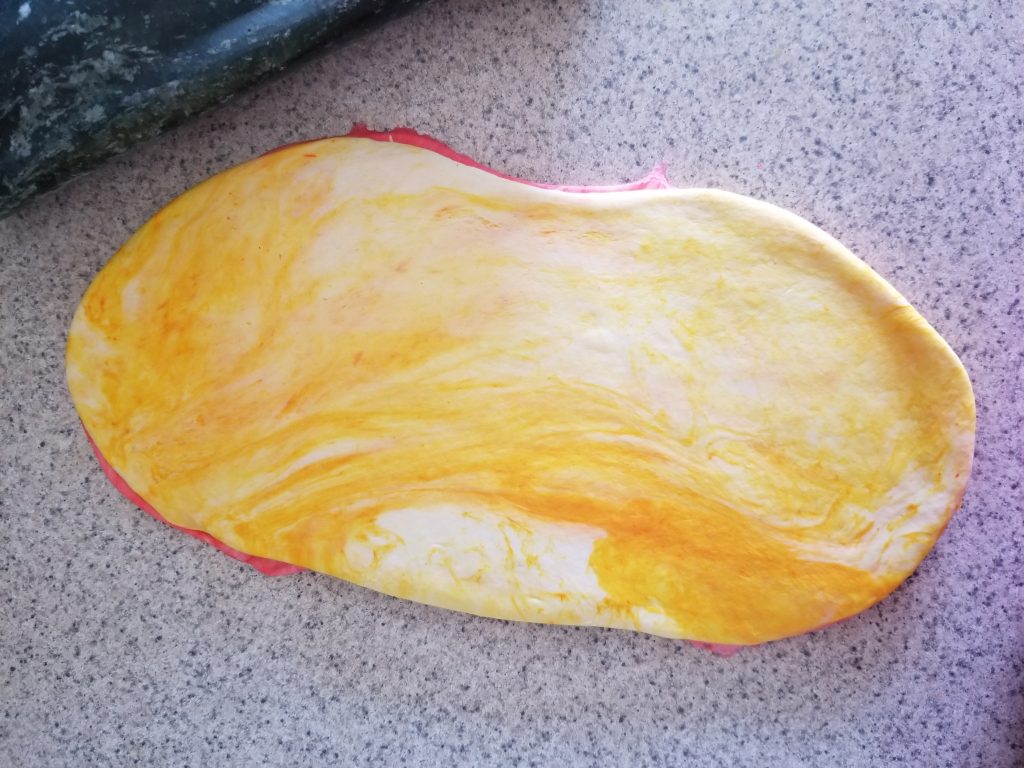
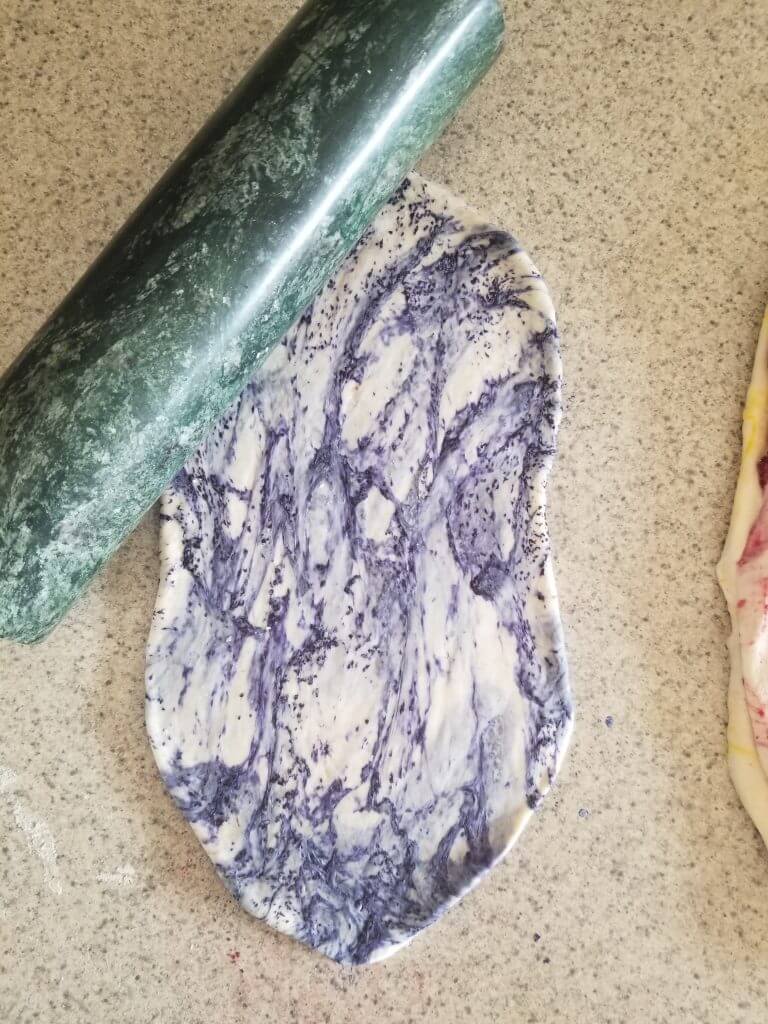
Add each piece of dough to your standing mixer fitted with a hook attachment 1 at a time along with the dye. You can use whatever color combinations you like!
Okay so, you're going to see 2 different colored dough's below. The first time I made my sourdough rainbow bagels I wanted to try using all-natural powdered food dyes.
Powders I tried:
- Beet root powder
- Passion fruit flakes
- Butterfly pea powder
- Blue spirulina powder
They worked okay. But, as you can see in the photos below, they did not blend into the dough as well as the 2nd time when I used liquid food dye.
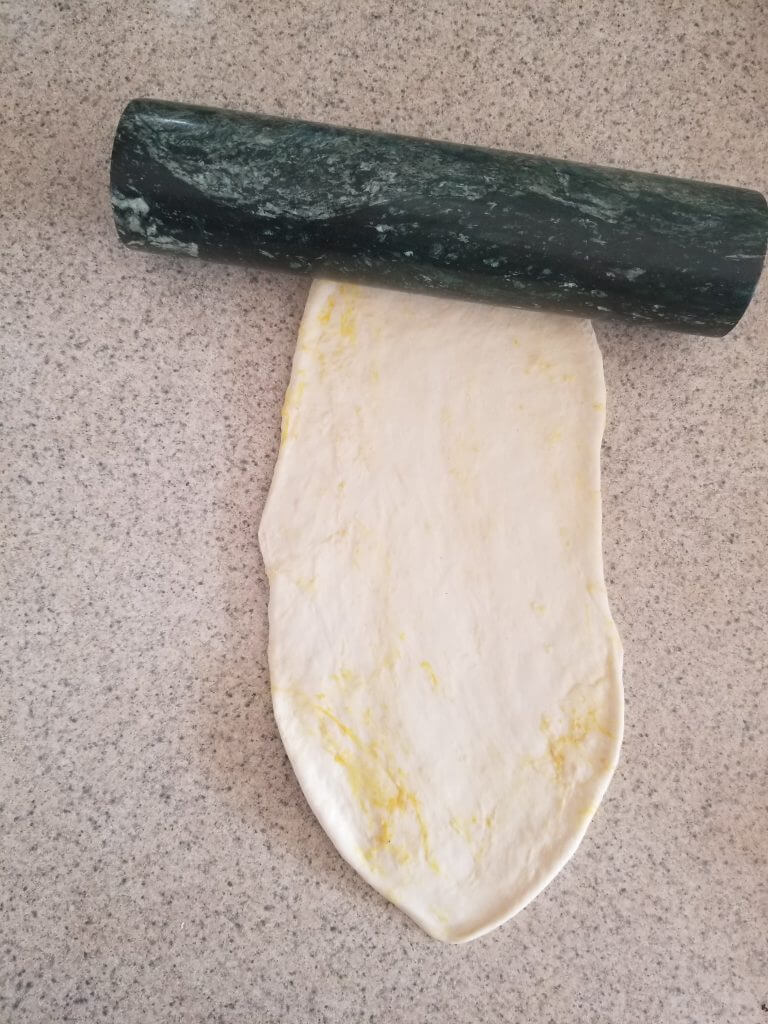
After you get the color into each ball of dough, roll it out to a rough oval shape. Mine were about 1 foot long x 6 inches across.
POWDERED NATURAL FOOD DYE VS LIQUID NATURAL DYE
HOW TO ROLL RAINBOW BAGELS
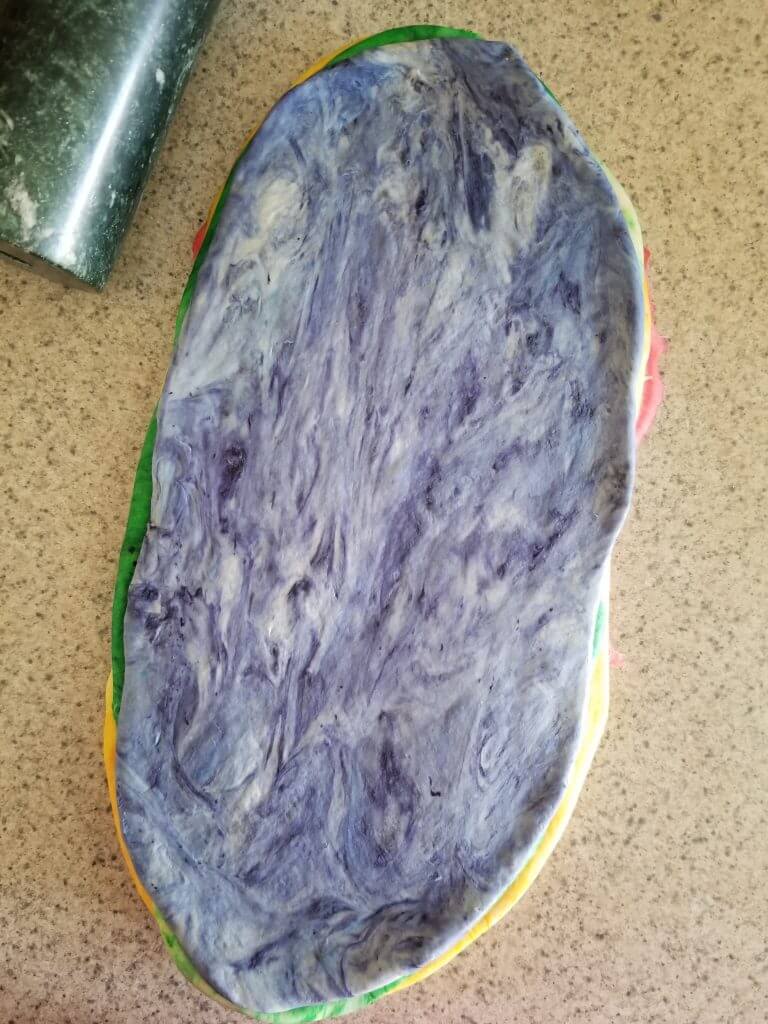
Stack each piece of dough on top of the next. Roll the whole stack to help them squish together more.
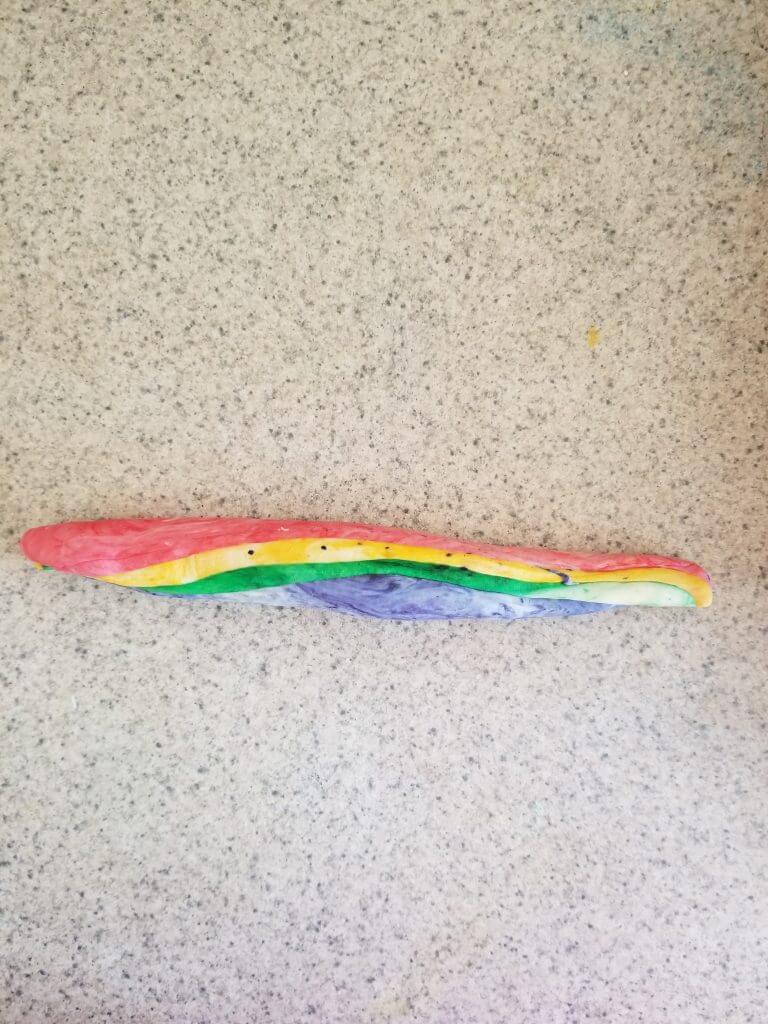
Cut your dough into 8 equal pieces. Or, cut it into 10 pieces for smaller bagels.

Roll each piece into a long log like this:
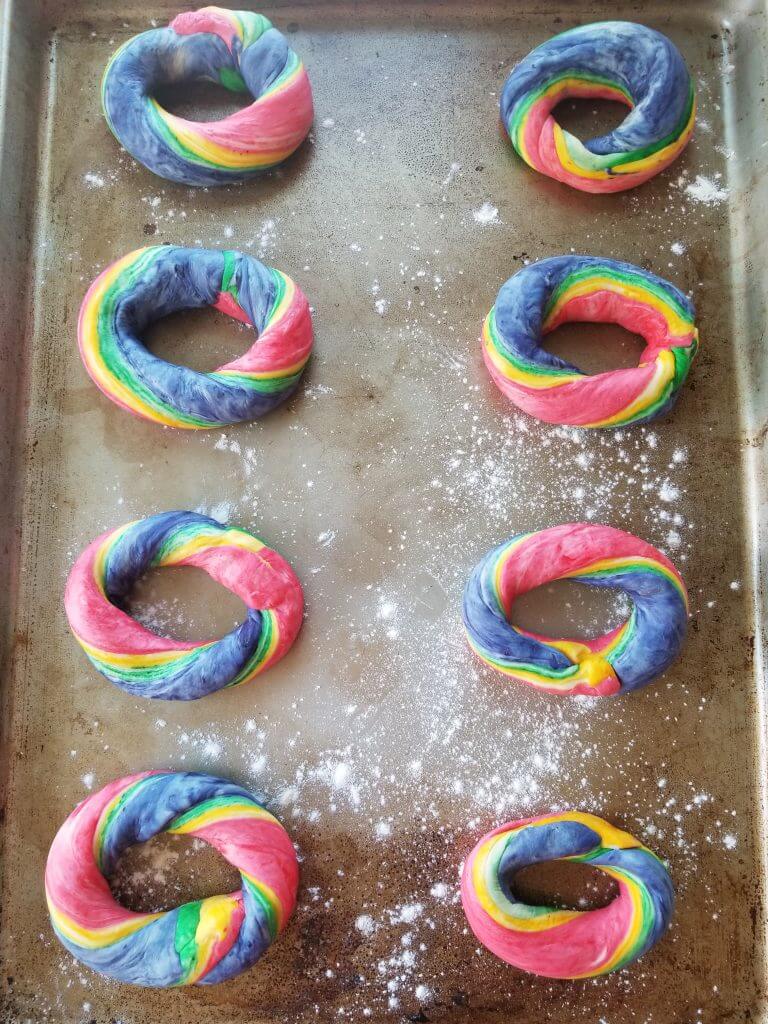
Connect the two ends together to form a bagel shape:
Place the formed bagels on a lightly floured baking tray.
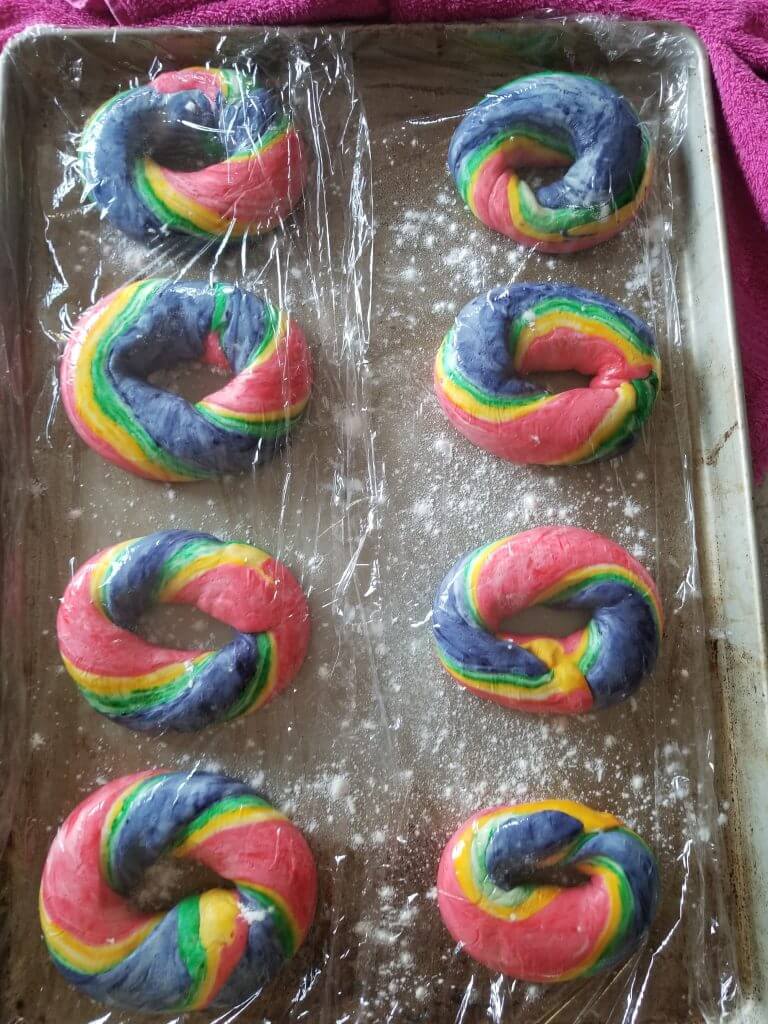
Sprinkle the tops with flour to prevent them from sticking really badly. Cover them with plastic wrap.
SECOND FERMENT (4-8 hours)
Let the bagels sit at room temperature, covered for 4-8 hours. After 4 hours perform the "float test."
The float test:
Fill a bowl with water. Add one of your bagels. If it floats, it has properly fermented and you can transfer the tray to the fridge to finish fermenting overnight (~12-24 hours).
If it sinks, it has not formed enough air pockets and needs to sit longer at room temperature.
Make sure to dry the bagel off after you have done the float test and re-cover your baking tray with the plastic wrap.
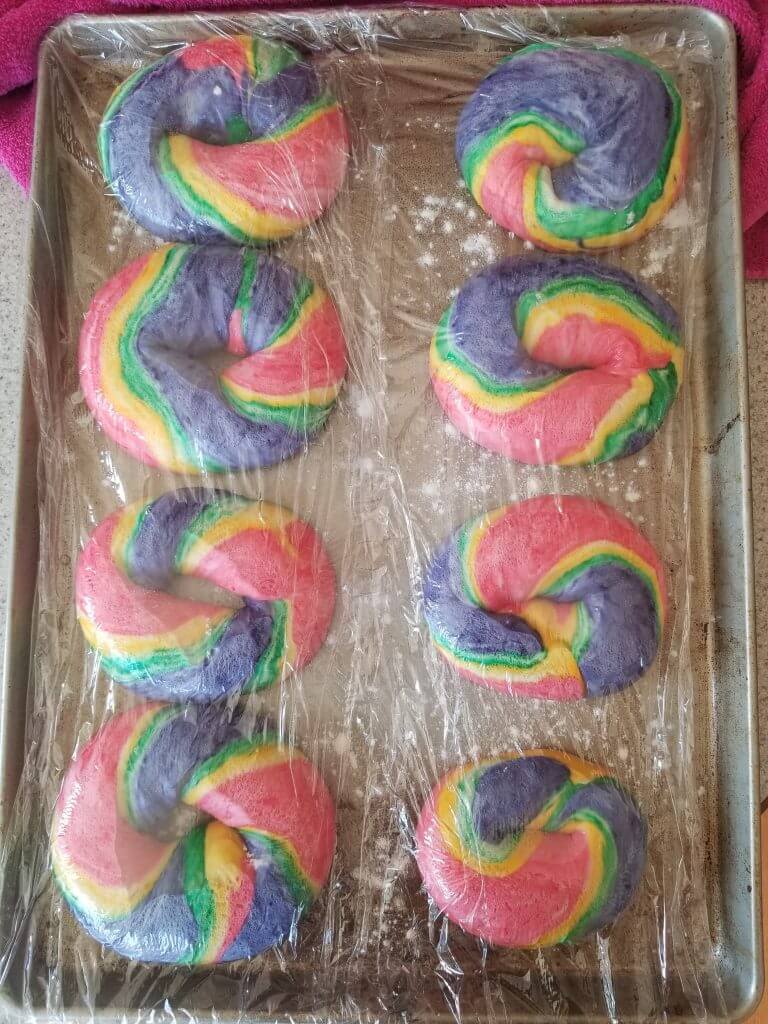
THIRD FERMENT (OVERNIGHT RISE ~12-24 HOURS)
SEE YOU BACK TOMORROW TO FINISH! Make sure you put the following things in the FRIDGE overnight.
WHAT TO PUT IN THE FRIDGE OVERNIGHT:
- Your tray of bagels
- A can of full fat coconut milk (for the vegan funfetti)
- ½ cup raw cashews covered in water (for the vegan funfetti)
after 4 hours
SOURDOUGH RAINBOW BAGELS DAY 2
Take your bagels out of the fridge and get ready for some boiling and baking!
Now before you remove the plastic wrap, you want to be VERY gentle. You don't want to deflate the bagels at all, or you will end up with a flat bagel.
I use my pastry scraper again to help get the bagel off the tray.
But before you even worry about moving your bagels around, lets get the water bath ready for boiling the bagels.
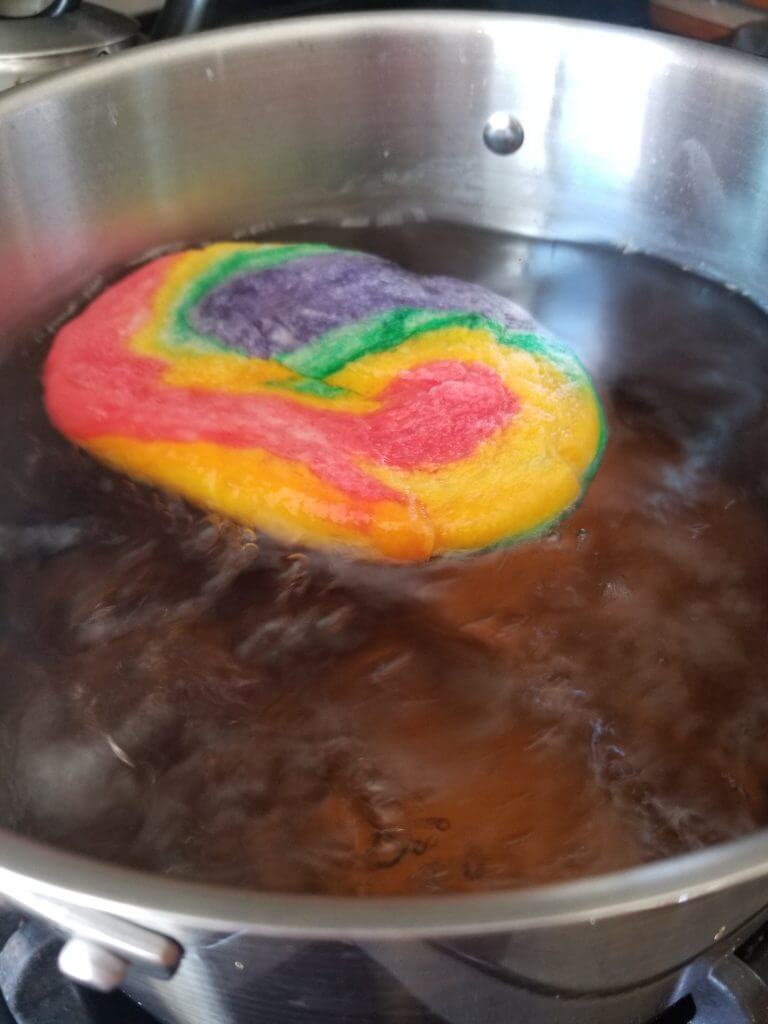
HOW TO BOIL RAINBOW BAGELS
Heat a large stockpot with water and a few tablespoons of brown sugar.
Keep the water at a low boil.
Add 1-2 bagels to the boiling water.
You will boil each bagel for 1 minute on each side. So, put the bagel in the boiling water, and after 1 minute flip it with the spoon and keep boiling the other side for 1 more minute.
Use a slotted spoon to remove the bagels from the water. This will help the water drain off the bagels.
Transfer the boiled bagels to a large baking sheet lined with parchment paper. Make sure to space the bagels evenly apart on the tray.
While you are boiling your bagels, preheat your oven to 450 degrees F. Once it reaches 450, reduce it to 400 and put the rack in the center of the oven for even air circulation.
HOW TO BAKE RAINBOW BAGELS
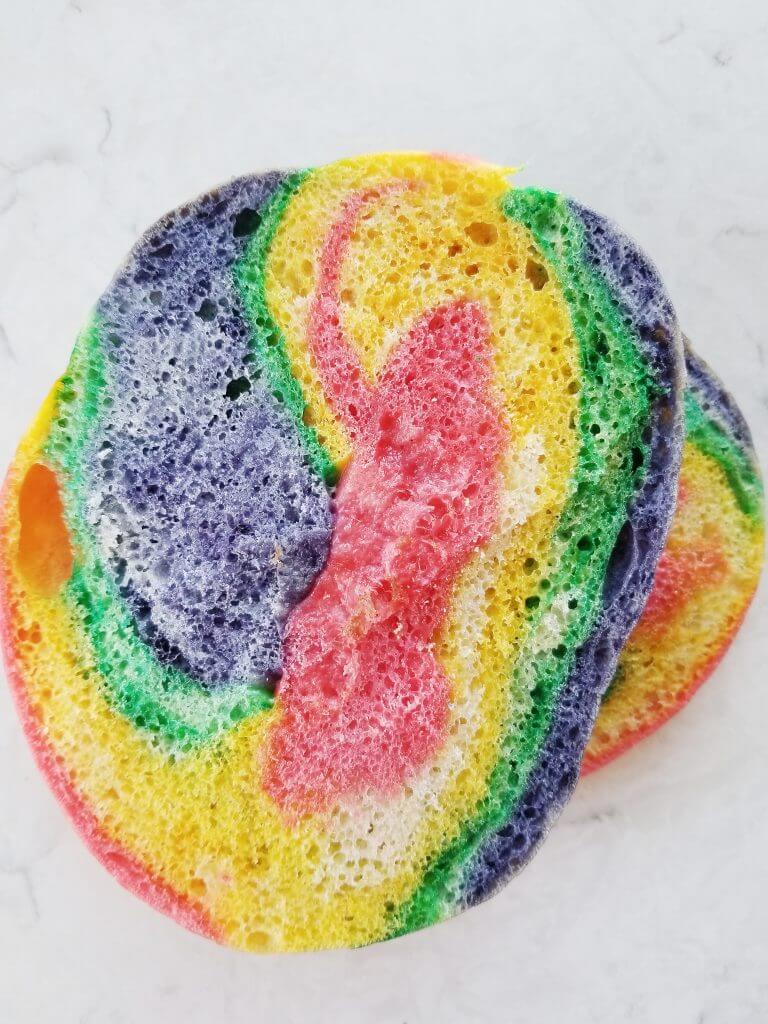
Once you have boiled all the bagels, they are ready to be baked!
Brush the tops of your bagels with egg whites using a pastry brush.
Bake them for ~18-22 minutes in the preheated oven. Or, until the tops are very light golden brown.
Allow them to cool completely on a wire cooling rack.

HOW TO MAKE VEGAN FUNFETTI CREAM CHEESE FILLING
Fit your standing mixer with a whisk attachment.
Scrape the hard portion of your chilled can of coconut milk into the bowl of the standing mixer.
This is what the can of coconut milk will look like after you refrigerated it:
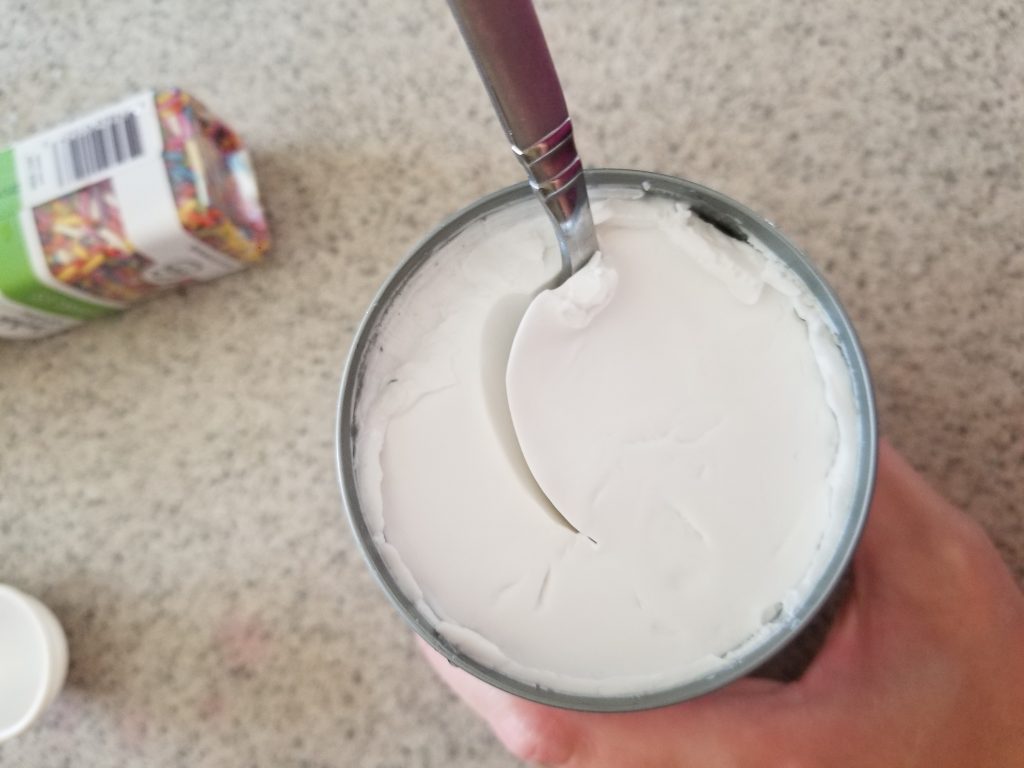
Whip the coconut milk until it is fluffy.
In a blender or food processor add: the soaked cashews (drain the water), ¼ cup maple syrup, 1 teaspoon of vanilla extract, a dash of sea salt. Let the blender run until the cashews are totally pureed.
Fold the cashew mixture gently into the coconut milk.
NOTE: You can also use just the coconut milk with the rainbow sprinkles for a "funfetti whipped cream."

Spread your funfetti cream "cheese" onto a toasted sourdough rainbow bagel and enjoy!
SOURDOUGH RAINBOW BAGELS. YUM!
More Homemade Bread Recipes you're going to love!
- Sourdough Beet Bagels
- Sourdough Cinnamon Rolls
- Pink Cinnamon Rolls
- Pumpkin Cinnamon Rolls
- Whole Wheat Ciabatta Bread
- Ciabatta Bread
- Ciabatta Bread Rolls
- The Best Sourdough Focaccia Bread
- Sourdough Naan Bread
- Whole Wheat Sourdough Naan Bread
- Sourdough Taco Shells
If you try my Healthy Sourdough Rainbow Bagel Recipe, please let me know your thoughts by leaving a rating and comment below! Ready for more? Subscribe to my newsletter or follow along on Pinterest, Instagram, Facebook, and Youtube!

Rainbow Sourdough Bagels with Vegan Funfetti Cream Cheese
Equipment
- dough scraper
- parchment paper or baking mat
- large tray for baking
Ingredients
For the dough:
- 1 cup active bubbly starter
- 1 ¼ cup room temperature water
- 2 tablespoon brown sugar
- 5 cups bread flour
- 2 teaspoon pink sea salt
- Water for boiling
- Brown sugar for boiling
Colors:
- 1 tablespoon beet root powder or liquid red food coloring
- 1 teaspoon blue spirulina or liquid blue food coloring
- ½ tablespoon butterfly pea powder or liquid purple food coloring
- 1 tbp passion fruit flakes or liquid yellow food coloring
- 1 teaspoon spirulina or liquid green food coloring
Egg wash for baking:
- 4 egg whites
For the cream "cheese"
- ½ cup raw cashews, soaked overnight
- 1 teaspoon vanilla extract
- ¼ cup pure maple syrup
- 1 can full fat coconut milk, refrigerated overnight
- dash pink sea salt
- ½ cup all natural rainbow sprinkles
Instructions
For the bagels:
day 1:
- Fit your standing mixer with a paddle attachment. Add 1 cup of active bubbly starter to the mixing bowl along with the 1 ¼ cup cold water and 2 tablespoons of brown sugar. Mix it until it is combined.
- Change to a hook attachment. Add the 5 cups of flour along with the salt. Mix on #2 speed for 6-7 minutes or until the dough is elastic and no longer sticky.
- Let the dough rest 20 minutes.
To color them:
- After 20 minutes, divide the dough into 4 pieces. Add each piece 1 at a time with the coloring you want to use to your standing mixer fitted with a hook attachment. Let your mixer run until the dough is completely colored. You will notice that the liquid dye mixes into the dough better than powdered dye.Flatten each colored piece by rolling it out with a rolling pin. Mine were about 1 foot long x 6 inches across.Lay each colored piece of dough on top of the next one. Use the rolling pin to help press the layers together.
- Slice the dough into 8 pieces. I used my pastry scraper to cut the dough. If you want the bagels to be smaller, divide into 10 pieces.
- Shape each piece of dough into a bagel shape. You can do this by:Rolling each piece of dough into a log. Then, connect the two ends.To get a "swirled" look, twist the log of dough before you connect the two ends.
- Flour a large baking sheet. Place the bagels on the sheet. Flour the tops of the bagels to prevent them from sticking. Cover with plastic wrap and let rest at room temperature for 4-8 hours.
- They should double in size, the time will vary depending on the temperature of your room. To tell if they are done, fill a bowl with water. Place one bagel in the water. If it floats, it is done. If it sinks, let it stand at room temperature for longer.Make sure to dry the bagel off before you put it back on the tray.
- After the bagel has passed the float test, cover the tray back up. Place it in the fridge for 12-24 hours. Usually, I let mine sit in the fridge overnight.
- IF YOU'RE MAKING THE CREAM CHEESE: now is the time to put your cashews in water to soak overnight so they are soft the next day. Put the can of full fat coconut milk in the fridge as well.
day 2:
- Preheat your oven to 450 degrees F and line a large baking sheet with parchment paper or a baking mat.
- Heat a large stockpot with water and 2 tablespoons of brown sugar.
- Gently remove the wrap from the bagels. Make sure you don't deflate them, or they will not be as puffy after you bake them. The bagels may stick to the tray a bit. You don't want to pull them off with just your hands, because this could result in deflated bagels. I use a pastry scraper to get the bagel off the tray.
- Boil each bagel in the water for 1 minute on each side. Use a slotted spoon or spatula to let the water drain off before placing them on the parchment paper lined baking tray.
- After you have boiled each bagel, use a pastry brush to lightly brush the top of each bagel with egg whites.
- Turn the oven down to 400.
- Bake them in the center rack of the oven for 18-22 minutes. You can tell if they are done when the tops are very light golden brown.
- Let them cool completely on a wire rack.
For the cream "cheese:"
- Drain the soaked cashews. Put the cashews in a food processor or blender along with the 1 teaspoon of vanilla extract, ¼ cup pure maple syrup, and the dash of sea salt. Let it food process for ~10 minutes or until it is completely pureed.
- Meanwhile, fit your standing mixer with a whisk attachment. Take your coconut milk from the fridge. Scrape just the hard portion from the can into the bowl of your standing mixer.
- Turn your standing mixer on speed #3 or #4 and let it run until it is fluffy.
- Gently fold your cashew puree into the whipped coconut milk. An alternative is to just use coconut milk with rainbow sprinkles.
- NOTE: If your house is very hot, the cream cheese may get soft very quickly. Just put it in the fridge to firm it up again.
- Spread on a toasted rainbow bagel and enjoy!


Katerina
Oh my goodness, Rosemary! What a fabulous recipe! I almost certainly do not have the patience to make these but how I would love to try them. They look amazing. Thanks so much for sharing the difference between the powdered colourings and the liquid colours too - that's so interesting! I hope you are enjoying eating all of these beauties!
Lauren
Oh wow! These are so pretty! I don't blame you - I wouldn't be able to resist either! Might be worth turning on the oven even despite the heat! Also beautiful job on the recipe, so detailed!! <3
Christie
These are just so amazing Rosemary! I love the colours so much! You are really stepping up your game with that and I love it. Keep up the amazing work! One day I need to try my hand at making this.
[email protected]
Haha!! Yes it takes a LOT of patience with that overnight ferment and all... and to think I did it twice LOL!
[email protected]
Haha!! What we really did was crank the AC And pretend that it was baking weather! As someone who always likes the windows open, you can see how badly I wanted to make these !
[email protected]
This means so much to read! I've been having a lot of fun making colorful food.. and just having fun with it again!
Anonymous
My bagels passed the float test before boiling but didn’t rise after boiling at all! & I’m pretty sure I made my bagels wayyy too big because I can fit my hand through the center of most of them
Jennifer
These look beautiful! What brand of natural liquid dye do you use? I can't wait to try these 🙂
Rosemary
I found it at my local health food store! You can check yours if you have one- or I know you can find them on line easily just look up natural food dye and look for the food label (ex: blue spirulina for blue, beet root for red, turmeric for yellow, etc) hope this helps!
Jennifer Todd
I successfully attempted these and am very happy with the results. Though when following the recipe, I found the dough very dry and lumpy. I had to add extra water because the food coloring would not take. I think I'll add more at the beginning as this ended up being a long, messy process. Other than that, mine turned out fantastic, though I plan to make them smaller next time. Thanks for the fun recipe! My kids are going to love these!
Rosemary
I'm so glad you loved them! They're so fun to make for the kids 🙂