


Now that you’ve patiently waited the 1-2 weeks, you can finally bottle and flavor your kombucha! While the first ferment does create a little bit of carbonation from the bacteria, it is not really enough to notice. Bottling it is necessary to get that fizzy carbonation.
We want that popping noise when we open the bottle amiright??
If you like the plain taste of kombucha, you can skip the first part of this article, which is about flavoring.
For those who want to add different flavors and experiment, read on! Flavoring is such a fun part of the kombucha making process. It allows me to think about the types of mocktails I might want to make. It’s also fun to add more than one flavor and see what you come up with!
Want to learn how to make Starbucks and Dunkin recipes at home, but healthier? Make sure to read my Healthy Iced Caramel Macchiato Tutorial, featuring my homemade healthy date caramel recipe that can also be used in tons of my healthy dessert recipes!
What you will need:
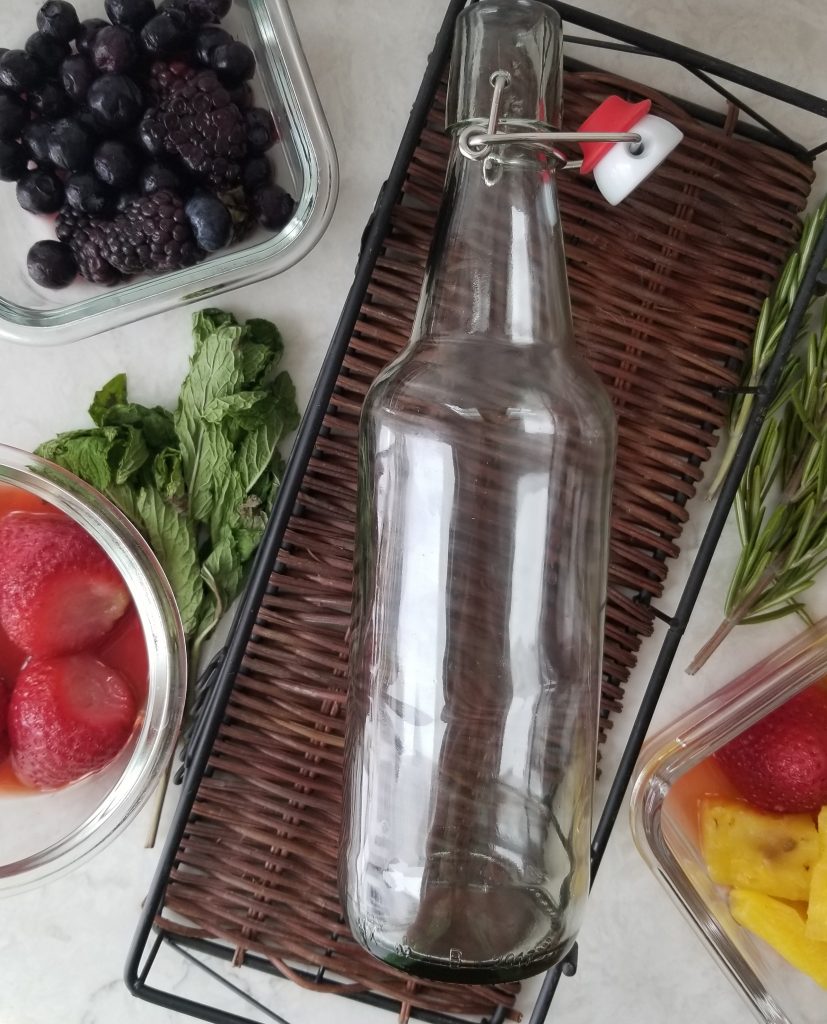
- Bottles that create a TIGHT seal
- Funnel (helps to prevent the kombucha from splashing all over your counter.. especially if you don't have a steady hand lol)
- Sugar, fruit, fruit juice, herbs
- Labels (optional). Labels help me remember what flavor I used!


Listed below are some flavoring ideas:
Juice
Juice is what I originally started with when I bottled my first batch of kombucha. It’s really easy, because you don’t have to worry about straining anything out later.
I like to use 100% organic juice, just because I don’t want any mysterious chemicals or additives in my home made kombucha.
You can use different ones like:
- Pineapple
- Guava
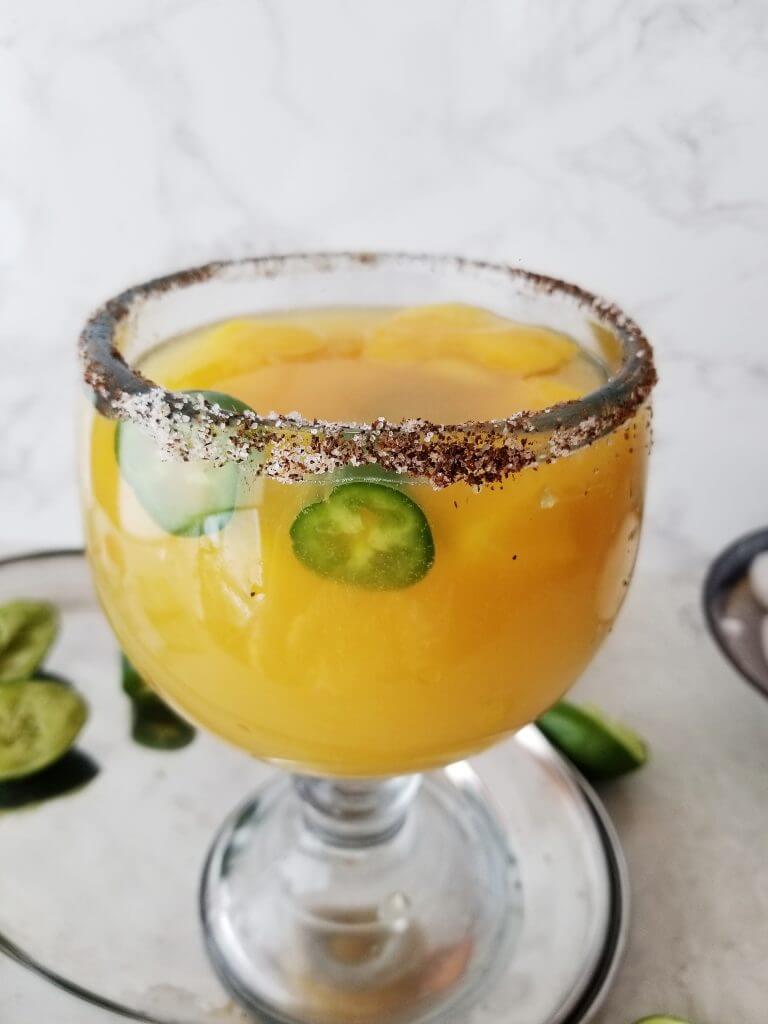
- Mango
- Orange
- Grape
- Pomegranate
- Cherry
and many more! The possibilities are endless.
Herbs
I recently started experimenting with adding herbs after I doing a dry January. I was looking for some flavorful additives to my mocktails, and I thought, what about a mojito. And thus, the mojito mocktail was born.
Here are some of the herbs that I like to use:
- Mint leaves
- Rosemary (that’s me)
- Basil
I like to add fresh leaves, but you can always experiment with dried. I haven’t tried that yet, but I’m sure the kombucha would partially re-hydrate it and bring out some flavors.
Fruit
Fresh fruit is always fun to add because it has such a rich flavor. I would definitely suggest partially crushing your fruit, just so some of the juice comes out to mix with your kombucha.
I have recently noticed that when I use whole or frozen fruit in bottling, rather than fruit juice, it creates MORE carbonation!
Fruits you can add:
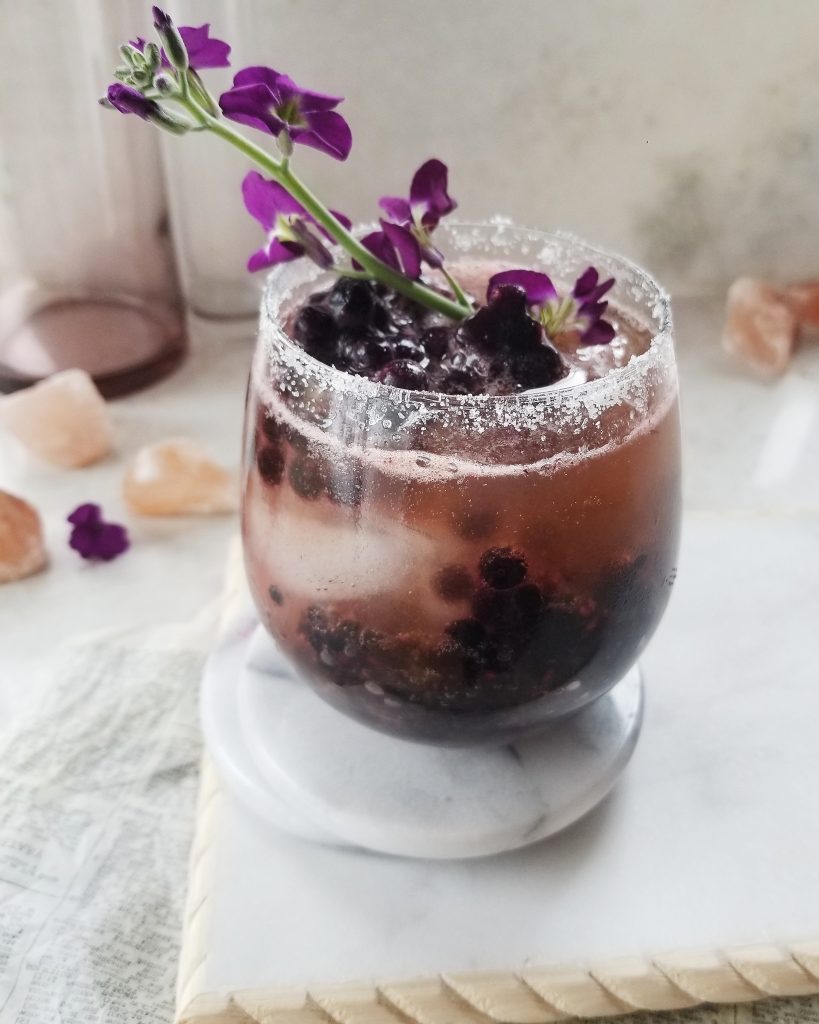
- Blueberries
- Blackberries
- Raspberries
- Strawberries
- Watermelon
- Kiwi
- Mango
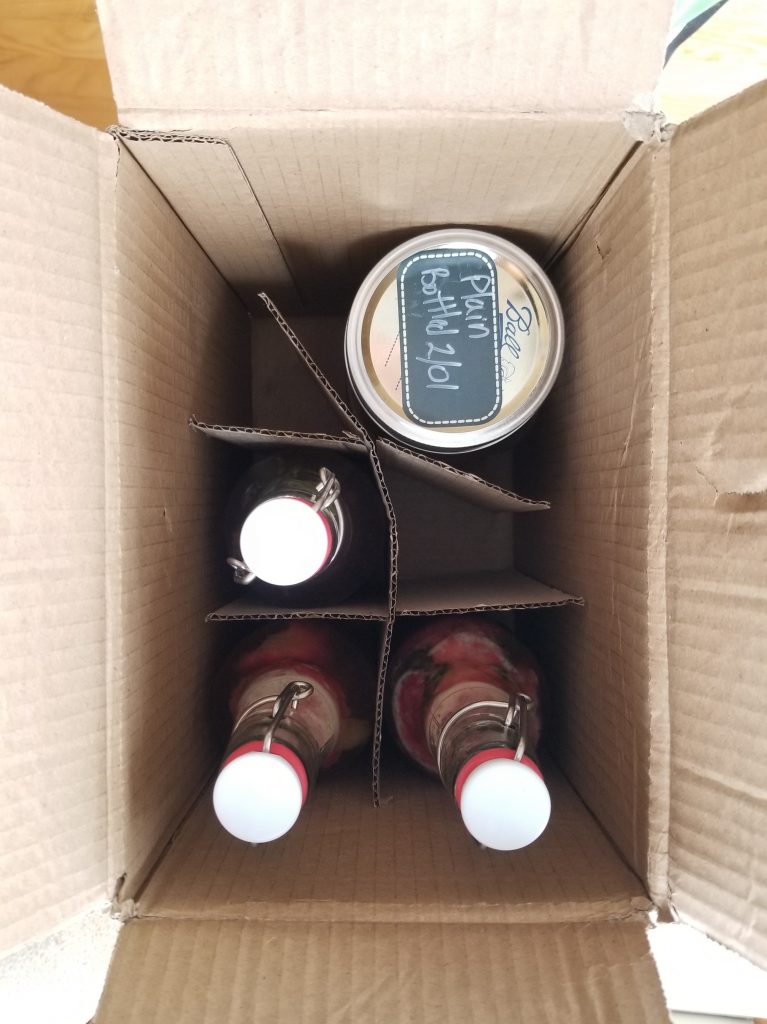
Now that you’ve picked what you want to add, lets get our bottles ready to bottle and flavor the kombucha.
Just like the big jar that we brewed in, it is important that our bottles are very clean.
If they’ve been previously used or unwashed, those bacteria can get into your fresh kombucha and spoil it. And after all the work and patience, you don’t want that happening!
How to bottle and Flavor your kombucha
Step 1:
Grab your funnel. Add about ½- 1 inch of the juice to the bottom of the bottle. If you are using the herbs or fruit, it is up to you how much to add. Remember, the more “stuff” you add to your bottle, the more of that flavor you will get.
More mint= more mint flavor
and more pineapple juice= sweeter kombucha

Step 2:
Remove your skoby and ~1 cup of the kombucha to a separate dish for your next brew.
IMPORTANT: Make sure you stir the kombucha around. Some of the good bacteria can settle to the bottom while brewing and this is needed for carbonation! I use a wooden spoon to stir it.
Step 3:
Fill the remaining portion of your jar with your fresh brewed kombucha.
I pour the jar of stirred kombucha into a pyrex measuring cup. Then I pour this cup into the funnel that I secured on top of the bottling jar.
Only leave ½- ¼ inch of room at the top. A lot of articles will tell you to leave an entire inch ... or even 2 inches at the top. They say that the bottle might explode during fermentation. However, when I used this method, I barely got any carbonation.
Instead, when you only leave ½-1/4 inch at the top, there is way less room for air to escape. So, the air is FORCED to stay inside the kombucha!
Carbonate it or store it
Close the lids on your kombucha. At this point, you can put it directly into the fridge. If you put it in the fridge the fermentation will virtually stop, so don't expect to have too much carbonation this way.
But, if you want that ‘booch fizz, you can leave the bottles out for an additional 2-3 days. I have even done 3 days and gotten a LOT of carbonation.
Secondary fermentation before refrigeration allows the beverage to continue to ferment. But, unlike the first ferment, the bottle is sealed, which traps the air inside, thus creating your carbonation!
Warmer temperatures= faster fermentation
Colder temperatures= slower fermentation
(remember cold=mold? You don't want the house to be too cold. Less than 65 degrees F is way too cold for it).
If your house is cold:
- Wrap your jar with a towel to help insulate it.
- Place your jar near a warm area, like the stove.
NOTE: If your house is colder or it is winter time you may want to lean towards 3 days of secondary fermentation.
How to tell if it is carbonated enough:
This is really your preference. 2 ways that I frequently use to check and see how bubbly it is before I put it in the final destination (the fridge):
- Gently turn it upside down and flip it right side up. Watch to see how many bubbles are created. You should see a lot of tiny bubbles rising to the surface
- Uncork it. If it is ready, you will hear that classic pop and see some of the bubbles escaping. Seal it back up immediately so you don't lose any more carbonation.
Worried that you OVER carbonated it?
Place your jar in a clean large bowl. Pop the top off. Kombucha may spray out of the bottle into the bowl. Yes this has happened to me before! It is funny because it happened in a batch that I used fresh rosemary and pineapple chunks.
Save the kombucha from the bowl and pour it over ice for a tasty drink!
After 2 days, or when it has enough carbonation, put your bottles into the fridge. I don’t typically strain out the stuff. I like to let it continue to all meld together. And, I think that the pieces of herbs and fruit inside look cool. On the other hand, you have to watch out for the chunks in your glass when you’re drinking it.
Straining it may also cause you to lose some carbonation.
So I find that it is best to strain it before I drink it.


So you can strain it before refrigerating and re-bottle it. Or, strain it as you pour. Up to you!

Enjoy it straight from the bottle, or make one of my gut-healthy and delicious beverages!
More Probiotic Gut Healing Drink Recipes you're going to love!
- How to Make Your Own Kombucha!
- Probiotic Mocktail
- Mango Orange Mojito Mocktail
- Spicy Mango Margarita Mocktail
- Strawberry Margarita Mocktail
- Blackberry Kombucha Mocktail
- UTI Prevention Mocktail
- Pina Colada Mocktail
- Frozen Watermelon Mocktail
- Middle Eastern Pomegranate Mocktail
And make sure to try out my Nature's Gatorade, Raspberry Lemon Chia Water, or my Blueberry Chia Seed Water to really help your gut health!
If you try my Bottling and Flavoring Kombucha Recipe, please let me know your thoughts by leaving a rating and comment below! Ready for more? Subscribe to my newsletter or follow along on Pinterest, Instagram, Facebook, and Youtube!


Leave me a comment!